This shop has been compensated by Collective Bias and its advertiser. All opinions are mine alone.
#FalsiesPushUpDrama #CollectiveBias
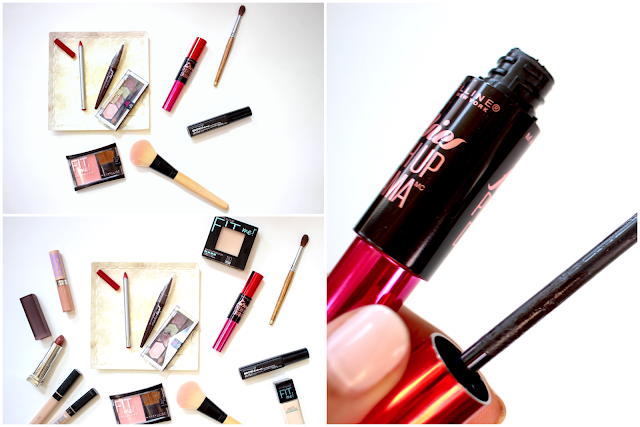
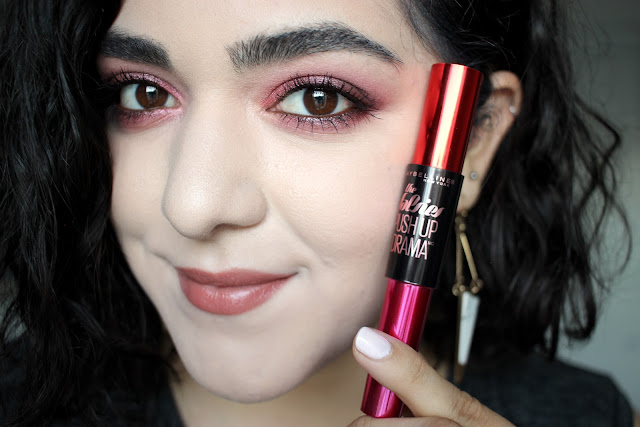
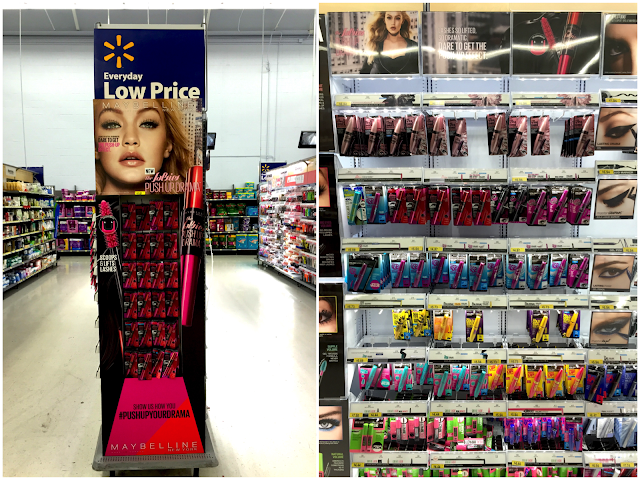
Now this isn't your everyday type of look or your traditional smokey eye, this look is for the daring girls. I decided to push the boundaries and go completely out of my neutral comfort zone to unleash my inner rock star. The inspiration for this smudgy red and pink smokey eye came from the new Maybelline Push Up Drama Mascara which I recently picked up from Walmart. You all know by now that I live for volumizing mascaras, and this mascara definitely gives me all the drama that I'm craving for. I'm not going to lie, my own idea of doing a red and pink smokey eye scared me at first but I'm so glad that I challenged myself because I ended up being obsessed with this look. I am guilty definitely guilty for taking one too many selfies that day, but can you blame me?I am already a huge fan of Maybelline but I needed to pick up a few more things from Walmart to bring my Maybelline Push Up Drama Mascara inspired makeup come to life. Here's what I picked up.
Maybelline Push Up Drama Mascara, $7.47
Maybelline Brow Drama Sculpting Brow Mascara in Deep Brown, $5.99
Maybelline EyeStudio Eyeshadow Quad in Mad For Mauve, $7.94
Maybelline Master Kajal Eyeliner in Midnight Brown, $6.94
Maybelline Fit Me Blush in Light Rose, $4.48
Maybelline ColorSensational Lip Liner in 50 Red, $5.50
I also used some of my favorite Maybelline products in my collection for this looks which you can also find at your local Walmart.
Maybelline Fit Me Matte + Poreless Foundation in 110 Porcelain, $5.94
Maybelline Fit Me Matte + Poreless Powder in 110 Porcelain, $5.94
Maybelline Fit Me Concealer in 10 Light and 15 Fair, $5.45
Maybelline Color Sensational Creamy Mattes Lipstick in Nude Nuance, $5.50
Maybelline Baby Lips Moisturizing Lip Gloss in 25 Taupe With Me, $3.86
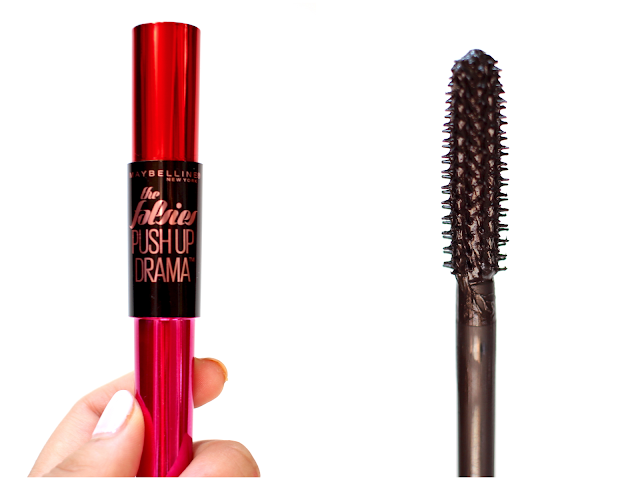
Here's what makes the new volumizing Maybelline Push Up Drama Mascara different from the other mascaras in their lineup. This is the first ever mascara to feature the innovative push up brush with cup-shaped rubber bristles. As you can see from the macro shot, the bristles are placed far apart which is going to allow the wand to deposit more product and instantly give you dramatic volume. The bristles are also quite short and thin which will help comb through the lashes and separate them. The mascara is also supposed to lift your lashes to a dramatic 45º. I found the formula in the Maybelline Push Up Drama Mascara to be quite creamy and easy to work with, which is great because you can add coats without having to worry about your lashes clumping up too much.
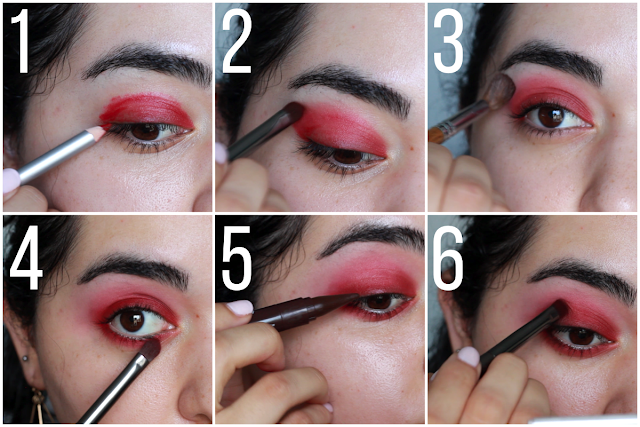
Here's how to achieve the daring smokey eye in 23 steps. It may look a little daunting but it's honestly not a very complicated look.
Step 1: Start off by applying the Maybelline ColorSensational Lip Liner in 50 Red as a base all over the lid. Makeup products can be multipurpose and in this case the waxy lip liner provided the best base for this look.
Step 2: Spread out the lip liner with a paddled shaped synthetic brush. You particularly want to focus on blending out the edges so that they don't look harsh.
Step 3: Talking about multipurpose products, with a fluffy blending brush I used the Maybelline Fit Me Matte + Poreless Powder in 110 Porcelain to help blend out the edges even further.
Step 4: Take the Maybelline ColorSensational Lip Liner in 50 Red and smudge it on the lower lash line for a more grunge look.
Step 5: Using the Maybelline Master Kajal Eyeliner in Midnight Brown, I'm going to deepen the outer corner prior to applying powder eyeshadows. The dark brown will become the base for the dark eyeshadow that we'll be placing.
Step 6: Blend the brown eyeliner into the red. I wanted to make the process of applying the powder eyeshadows easier by making sure I had a guide of where to place the eyeshadows. The base does not have to be perfectly blended out.
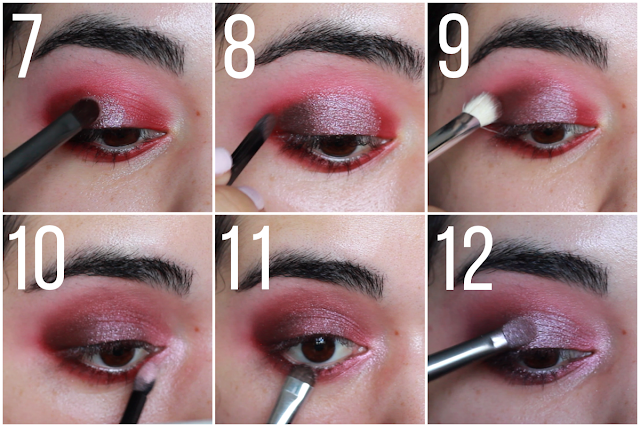
Step 7: Time to start applying the eyeshadow! I began with the second shade in the Maybelline EyeStudio Eyeshadow Quad in Mad For Mauve and applied it on the lid. I made sure to leave the inner corner empty because we'll be applying the lightest shade there. Pro tip: To get the maximum effect out of these shimmery eyeshadows wet the brush with eye drops or setting spray prior to application to create a foiled effect.
Step 8: Using the thin sponge applicator that came with the palette I applied the dark plum eyeshadow where we placed the brown eyeliner. Make sure to pat the shadow on your lid to avoid getting too much fallout on your cheeks. I do want to point out that fallout is normal for smokey eyes, that's why I started off this look with the eyes.
Step 9: Here comes the blending! There's always a lot of blending required when you're doing smokey eyes. Just make sure to take your time blending out to get the best result.
Step 10: Now it's time to add some light! I used the sponge applicator again to apply the lightest shade in the quad in the inner corner of the eye.
Step 11: I replicated what I did on the lid on the lower lashline using a short and stiff brush. Make sure to blend downwards to create a hazy effect.
Step 12: With all the blending some of the colors will lose the initial intensity. To fix that just apply a bit more of the second eyeshadow in the quad to the center of the lids.
Step 13: When working with a red or pink look, you want to make sure your base is flawless. That means you can't allow any red pimples to peak through because they're going to stand out much more. I used one of my favorite foundations, the Maybelline Fit Me Matte + Poreless Foundation in 110 Porcelain, to even out my uneven music festival skin tone. This foundation may look light but that's because my neck and chest are still quite fair.
Step 14: I started applying the Maybelline Fit Me Concealer in 15 Fair on places I wanted to highlight and on any blemishes. Then I used a bit of the Maybelline Fit Me Concealer in 10 Light under my eyes to help cover up the dark circles.
Step 15: We're going to be using the Maybelline Fit Me Matte + Poreless Powder in 110 Porcelain once again, but this time for its intended use. When setting your foundation and concealer make sure to press your brush to avoid moving your base makeup around.
Step 16: When doing something as dramatic as this smokey eye you always want to keep cheek products on the subtle side, so no fuschia blush unless that's the look you're going for. I used the Maybelline Fit Me Blush in Light Rose for this look but swept it upwards so it could also define my face a bit.
Step 17: I have to say that I was very #blessed with naturally bold brows, so all I have to do is add a hint of tint and set them in place. The perfect product for girls such as myself is the Maybelline Brow Drama Sculpting Brow Mascara in Deep Brown. I love the formula of this product but I was personally not a big fan of the spherical tip because it would always get product on my skin. What did I do? I cut it with some wire cutters and now I have the perfect sized brush for my brows.
Step 18: To add more depth to this smokey eye I used the Maybelline Master Kajal Eyeliner in Midnight Brown on the tightline and waterline. The conical shape of this eyeliner makes it so much simpler because all you have to do is place the eyeliner sideways and drag.
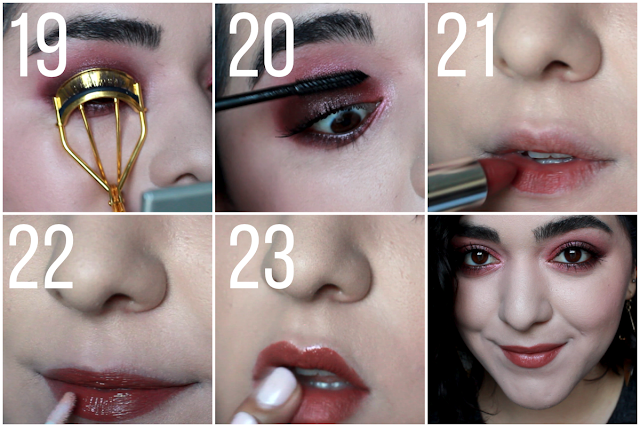
Step 19: I always curl my lashes prior to applying any mascara. I find that curling your lashes really makes a difference, especially when applying a volumizing mascara.
Step 20: Time for the star product of this look, the Maybelline Push Up Drama Mascara. When applying this mascara you want to make sure you push the wand upwards, that will not only deposit the product but also comb through your lashes. Pro tip: Move the wand outwards on the outer lashes to create a flared look.
Step 21: I decided to play up the warm tones in eyes and use a lipstick that had a warm undertone. The Maybelline Color Sensational Creamy Mattes Lipstick in Nude Nuance is one of my favorite lipstick shades and it worked perfectly with this look.
Step 22: I wanted to give the lips a bit of dimension so I added a bit of the Maybelline Baby Lips Moisturizing Lip Gloss in 25 Taupe With Me just on the middle of the lips. Applying gloss in the center of your lips will give the illusion that they're fuller.
Step 23: I didn't want a perfect lipstick application with this look so I used my finger to create a more worn in lip look. Just tap your finger over your lip over and over until you've reached your desired effect.
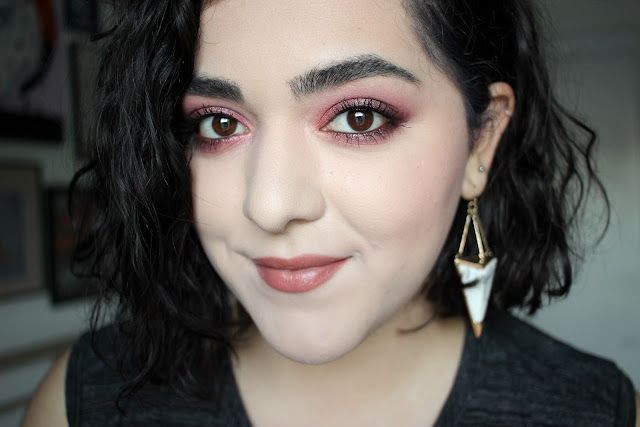
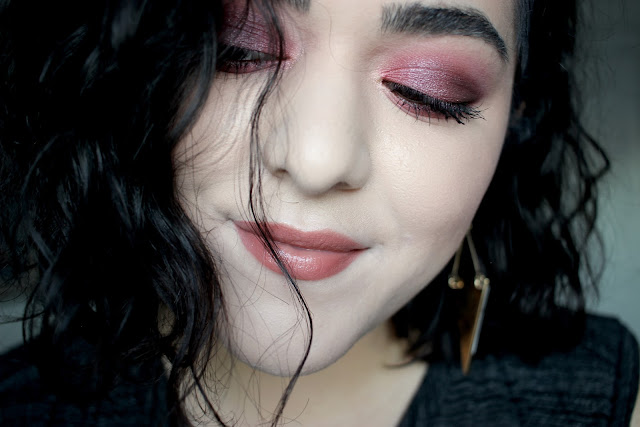
Here's the final look! As previously mentioned, this isn't your ordinary smokey eye but I think the colors work perfectly for fall. I became obsessed with the rocker vibes that this look was giving me, and the lashes really helped pull this look together.
If you would like to recreate this dramatic look make sure to stop by your local Walmart and pick yourself some of the Maybelline shown in this post.
What's your all-time favorite Maybelline product? Let me know in the comments below. Also, would any of you try this look? I know some of you loved it over on Snapchat.
Disclaimer: This is a sponsored blog post with #CollectiveBias, Walmart, and Maybelline. I personally felt that this was appropriate for my blog and this whole blog post was produced entirely by myself. The red smokey eye was completely my own and the inspiration came to me when I challenged myself to think outside the box.



No comments :
Post a Comment