This shop has been compensated by Collective Bias, Inc. and its advertiser. All opinions are mine alone. #WardrobeSolutions #CollectiveBias
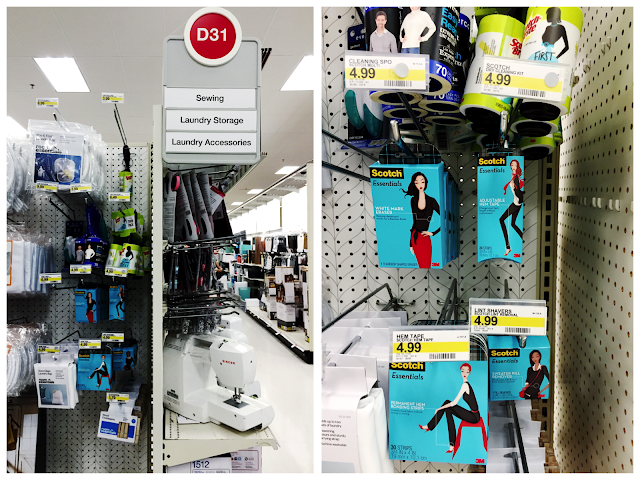
Let me fill you in on a little secret... I absolutely suck at sewing clothes. Whenever I need something hemmed or repaired, then I'll either ask my mom or get it done at the dry cleaners because otherwise I don't trust myself with a needle and thread. There's a few items in my closet that I haven't even worn because I find the fit very unflattering, like this maxi skirt. I know many people love maxi skirts, but they're just not my cup of tea because they make me look a bit frumpy. If you're someone that isn't the best at altering clothes, then you're going to love this easy and very affordable solution that I found at Target. This requires absolutely no sewing skills and it will only take you a few minutes to do. Plus this is a great way to update your wardrobe without feeling the need to purchase more clothes.All the items that you'll need for this DIY project can be conveniently found in the laundry accessories section at Target by the sewing machines and kits.
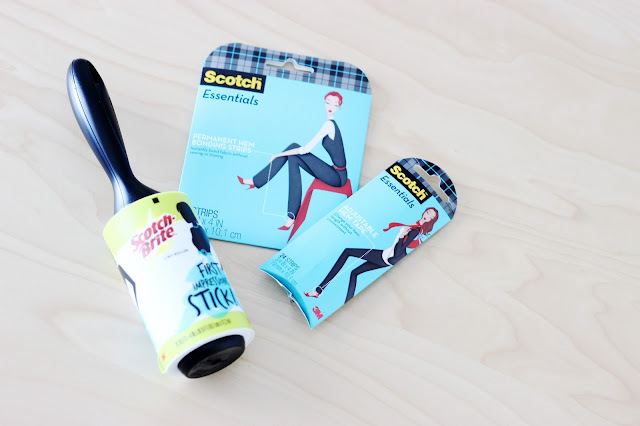
1. Scotch™ Essentials Permanent Hem Bonding Strips, $4.99 (Used on skirt)
If you're familiar with the iron-on bonding strips and don't really like them, then you'll love these. There's absolutely no need for an iron and they can be used in a variety of different ways. Not only can you use the Permanent Hem Bonding Strips on clothing (such as a pair of jeans), but you can also use them to easily hem curtains or to make a few decorative pillows. The strips have a very sticky formula that instantly bonds the fabric without the need of an iron, and it's able to withstand cold washes and low temperature dry cycles. I kind of wish I would have known about this sooner because I used to be that teen with a messed up hem on my jeans because they were always dragging on the floor.
2. Scotch™ Essentials Adjustable Hem Tape, $4.99 (Used on shirt)
If you're someone who experiences the dreaded button down cleavage gap or is constantly fussing around with rolled up sleeves that don't stay in place, then this is going to be your new BFF. Unlike the Permanent Hem Bonding Strips, the Adjustable Hem Tape is not permanent so you have the freedom of removing the tape at the end of the day. This tape also allows you to change the hem as you please, which will certainly come in handy when I wear my mom jeans. I know I'm definitely going to be carrying the Adjustable Hem Tape in my handbag from now on, just in case there's any wardrobe malfunctions in my future. Now I'll be able to wear my button down shirts without worrying about the cleavage gap.
3. Scotch-Brite™ Lint Roller, $3.99 (Used on skirt)
If your wardrobe is comprised of mostly black clothing like mine is, then the Lint Roller is a must. I always manage to get lint, tons dog hair (thanks to my chow chow, Buster), and my own hair on my black tops. I literally have lint rollers everywhere you can think of and this one is going in my car so I can keep my clothing lint and hair free all day long. Plus this one is super sticky, so I end up using a lot less sheets!
All the Scotch™ Essentials items are already very affordable, but you'll be able to save $1 off with this digital coupon until September 2nd. And if you're a fan of the Cartwheel app like I am (that app is my partner in crime whenever I shop at Target), then you'll be able to receive 5% off Scotch™ Essentials products from July 24th-July 30th.
Other materials needed: Clothing that you want to alter, scissors, and sewing pins (optional), and tailor's chalk/marker (optional).
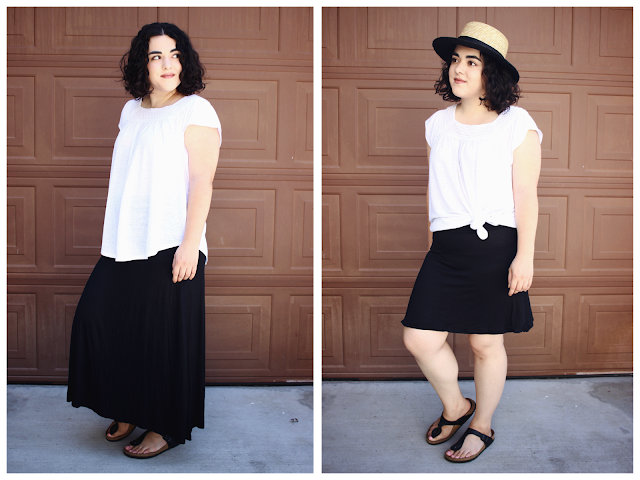
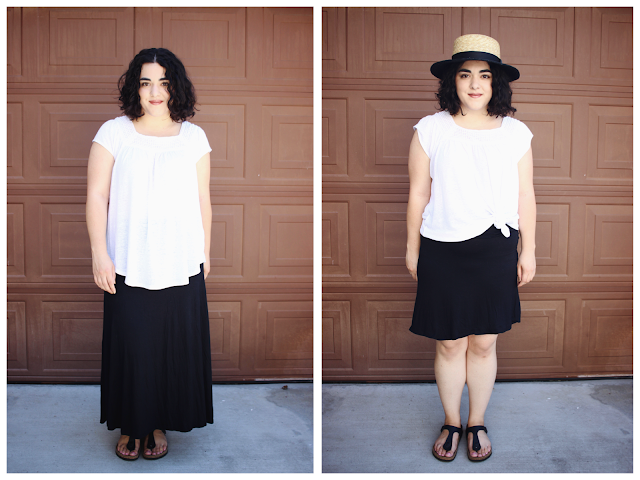
Let's turn the shapeless maxi skirt into a more flattering knee-length skirt!
1. I put my skirt on and made a little snip about an inch below where I wanted the skirt to hit. I originally wanted to turn this skirt into a midi skirt but the 90ºF weather this weekend made me change my mind, so I made it a bit shorter. If you want to be very precise about your measurements, then I would recommend using a marker or tailor's chalk to trace a line before you cut.
2. I turned the skirt inside out and took out three sheets of the Permanent Hem Bonding Strips. I did a few practice runs of how I wanted the hem to look like before sticking on the strips. Again, if you want to be very precise then I would recommend using sewing pins to indicate where the new hem will be made. I personally don't have sewing pins, so I just tried to be as careful as possible.
3. Before you remove the Permanent Hem Bonding Strips I would highly recommend you to moisten your thumbs and fingertips because the strips are incredibly sticky. Peel the strip off the white paper slowly and try not to touch the adhesive, otherwise it will stick to your fingers (especially if they're dry). Once you remove the strip, place it inside the new hem and remember that there's no turning back once this comes in touch with the fabric. Cher won't be able to turn back time if you mess this step up, so remember that you only have one chance!
4. Once you stuck all the Permanent Hem Bonding Strips along the new hem, then it's time to peel off the brown paper. Before you peel off make sure that you rub firmly on the brown paper, that way the adhesive will stick better to the clothing. Rubbing on the brown paper for a few seconds will make it much easier to remove it, trust me. Once you do manage to peel off the paper, do it slowly otherwise the adhesive might create a wrinkled effect like it happened to me (noob mistake, I know).
5. Fold the fabric over so it can stick to the Permanent Hem Bonding Strips. This step was a bit difficult with the fabric of my skirt because it's thin and stretchy (Note to self: Avoid using very stretchy fabric). If you use a thicker fabric like denim, then you'll have a much easier time creating a precise hem. I'm definitely going to be using these strips to make myself a kick ass pair of denim shorts in the near future now that I have the hang of the strips.
6. Last step is to turn the skirt right side out and roll away all the lint with the Scotch-Brite™ Lint Roller. For some reason the skirt ended up with so much white lint from this little DIY and I think I have my white shirt to blame for that.
Now for the ridiculously easy way to keep your sleeves rolled up all day long.
1. Rolling up your sleeves or make them a bit shorter has never been this easy! Honestly where has the Scotch™ Essentials Adjustable Hem Tape been all my life? I could have been using this tape instead of constantly rolling up my sleeves throughout the day, and then ultimately giving up because ain't nobody got time for that.
2. I turned the shirt inside out and then placed the sleeve downwards to see the width of the sleeve. Before adding the strip I created a fold to see how far up I wanted to create the temporary rolled up effect. I just decided to make the sleeves a bit shorter, so the change was much more subtle than the skirt.
3. Once I decided how much I wanted to "roll up" my sleeves, I peeled the paper off the strip and placed it on the sleeve. The Adjustable Hem Tape is not as sticky as the Permanent Hem Bonding Strips, so they're much easier to work with and you won't have to moisten your fingertips. It's also much easier to peel off the paper to create your new hem or keep your sleeves rolled up. And if you happen to mess this up, then you can simply peel off the strip and try again!
And that's how I upcycled two of my least worn items! I turned my maxi skirt into a summer-friendly knee-length skirt and gave the illusion of shorter sleeves to my shirt. I will definitely be using the skirt a lot more now that it doesn't make me look frumpy. And like I said, I will be using the Permanent Hem Bonding Strips very soon to create denim shorts from a pair of thrifted jeans.
What do you think of the Scotch™ Essentials products? Will you be trying these products out to upcycle some items in your wardrobe or to do home related DIY project? Let me know in the comments below. And if you need any inspiration, make sure to check out these fun ideas.
Disclaimer: This is a sponsored blog post with #CollectiveBias, Target, and Scotch™. I personally felt that this was appropriate for my blog and this whole blog post was produced entirely by myself.


No comments :
Post a Comment